Understanding Contouring Effects
Contouring is a makeup technique that utilizes products a few shades darker and lighter than your natural skin tone to redefine and sculpt the facial structure. The "before" and "after" transformation can be quite significant, showcasing the power of strategic makeup application to enhance features.
The "Before": Natural or Base-Applied Face
Prior to contouring, especially after applying foundation and concealer, the face can appear somewhat one-dimensional. Foundation evens out the skin tone, which can inadvertently diminish the natural shadows and highlights that give the face its shape.
Characteristics often include:
- Less Defined Bone Structure: Cheekbones, jawline, and the bridge of the nose may appear softer or less prominent.
- Uniformity: The overall complexion is even, lacking the subtle variations in depth that occur naturally.
- A Flatter Appearance: Without the interplay of light and shadow, features may not stand out as distinctly.
The "After": Sculpted and Enhanced Features
Post-contouring, the face typically exhibits enhanced definition and dimension. By strategically placing darker shades (contour) to create shadows and lighter shades (highlight) to attract light, specific features are accentuated.
Common results include:
- More Prominent Cheekbones: Applying contour beneath the cheekbones creates the illusion of higher, more defined cheeks.
- Slimmer or Reshaped Nose: Contouring along the sides of the nose and highlighting the bridge can alter its perceived shape, often making it appear narrower or straighter.
- Defined Jawline and Chin: Contouring along the jawline and under the chin can create a sharper, more sculpted lower face.
- Lifted Eyes: Subtle contouring in the crease and highlighting the brow bone can make eyes appear larger and more lifted.
- Overall Facial Balance: The technique helps to balance facial proportions, bringing desired features forward and causing others to recede.
Key Principles for Effective Transformation
The successful transition from "before" to "after" with contouring hinges on understanding and applying fundamental techniques:
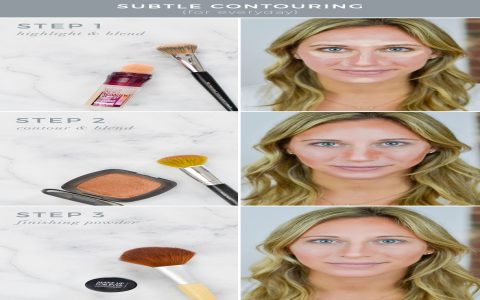
- Product Choice: Selecting appropriate shades is crucial. Contour products are typically matte and cool-toned to mimic natural shadows. Highlighters can be matte or shimmery depending on the desired effect. Cream, liquid, and powder formulas offer different finishes and levels of intensity.
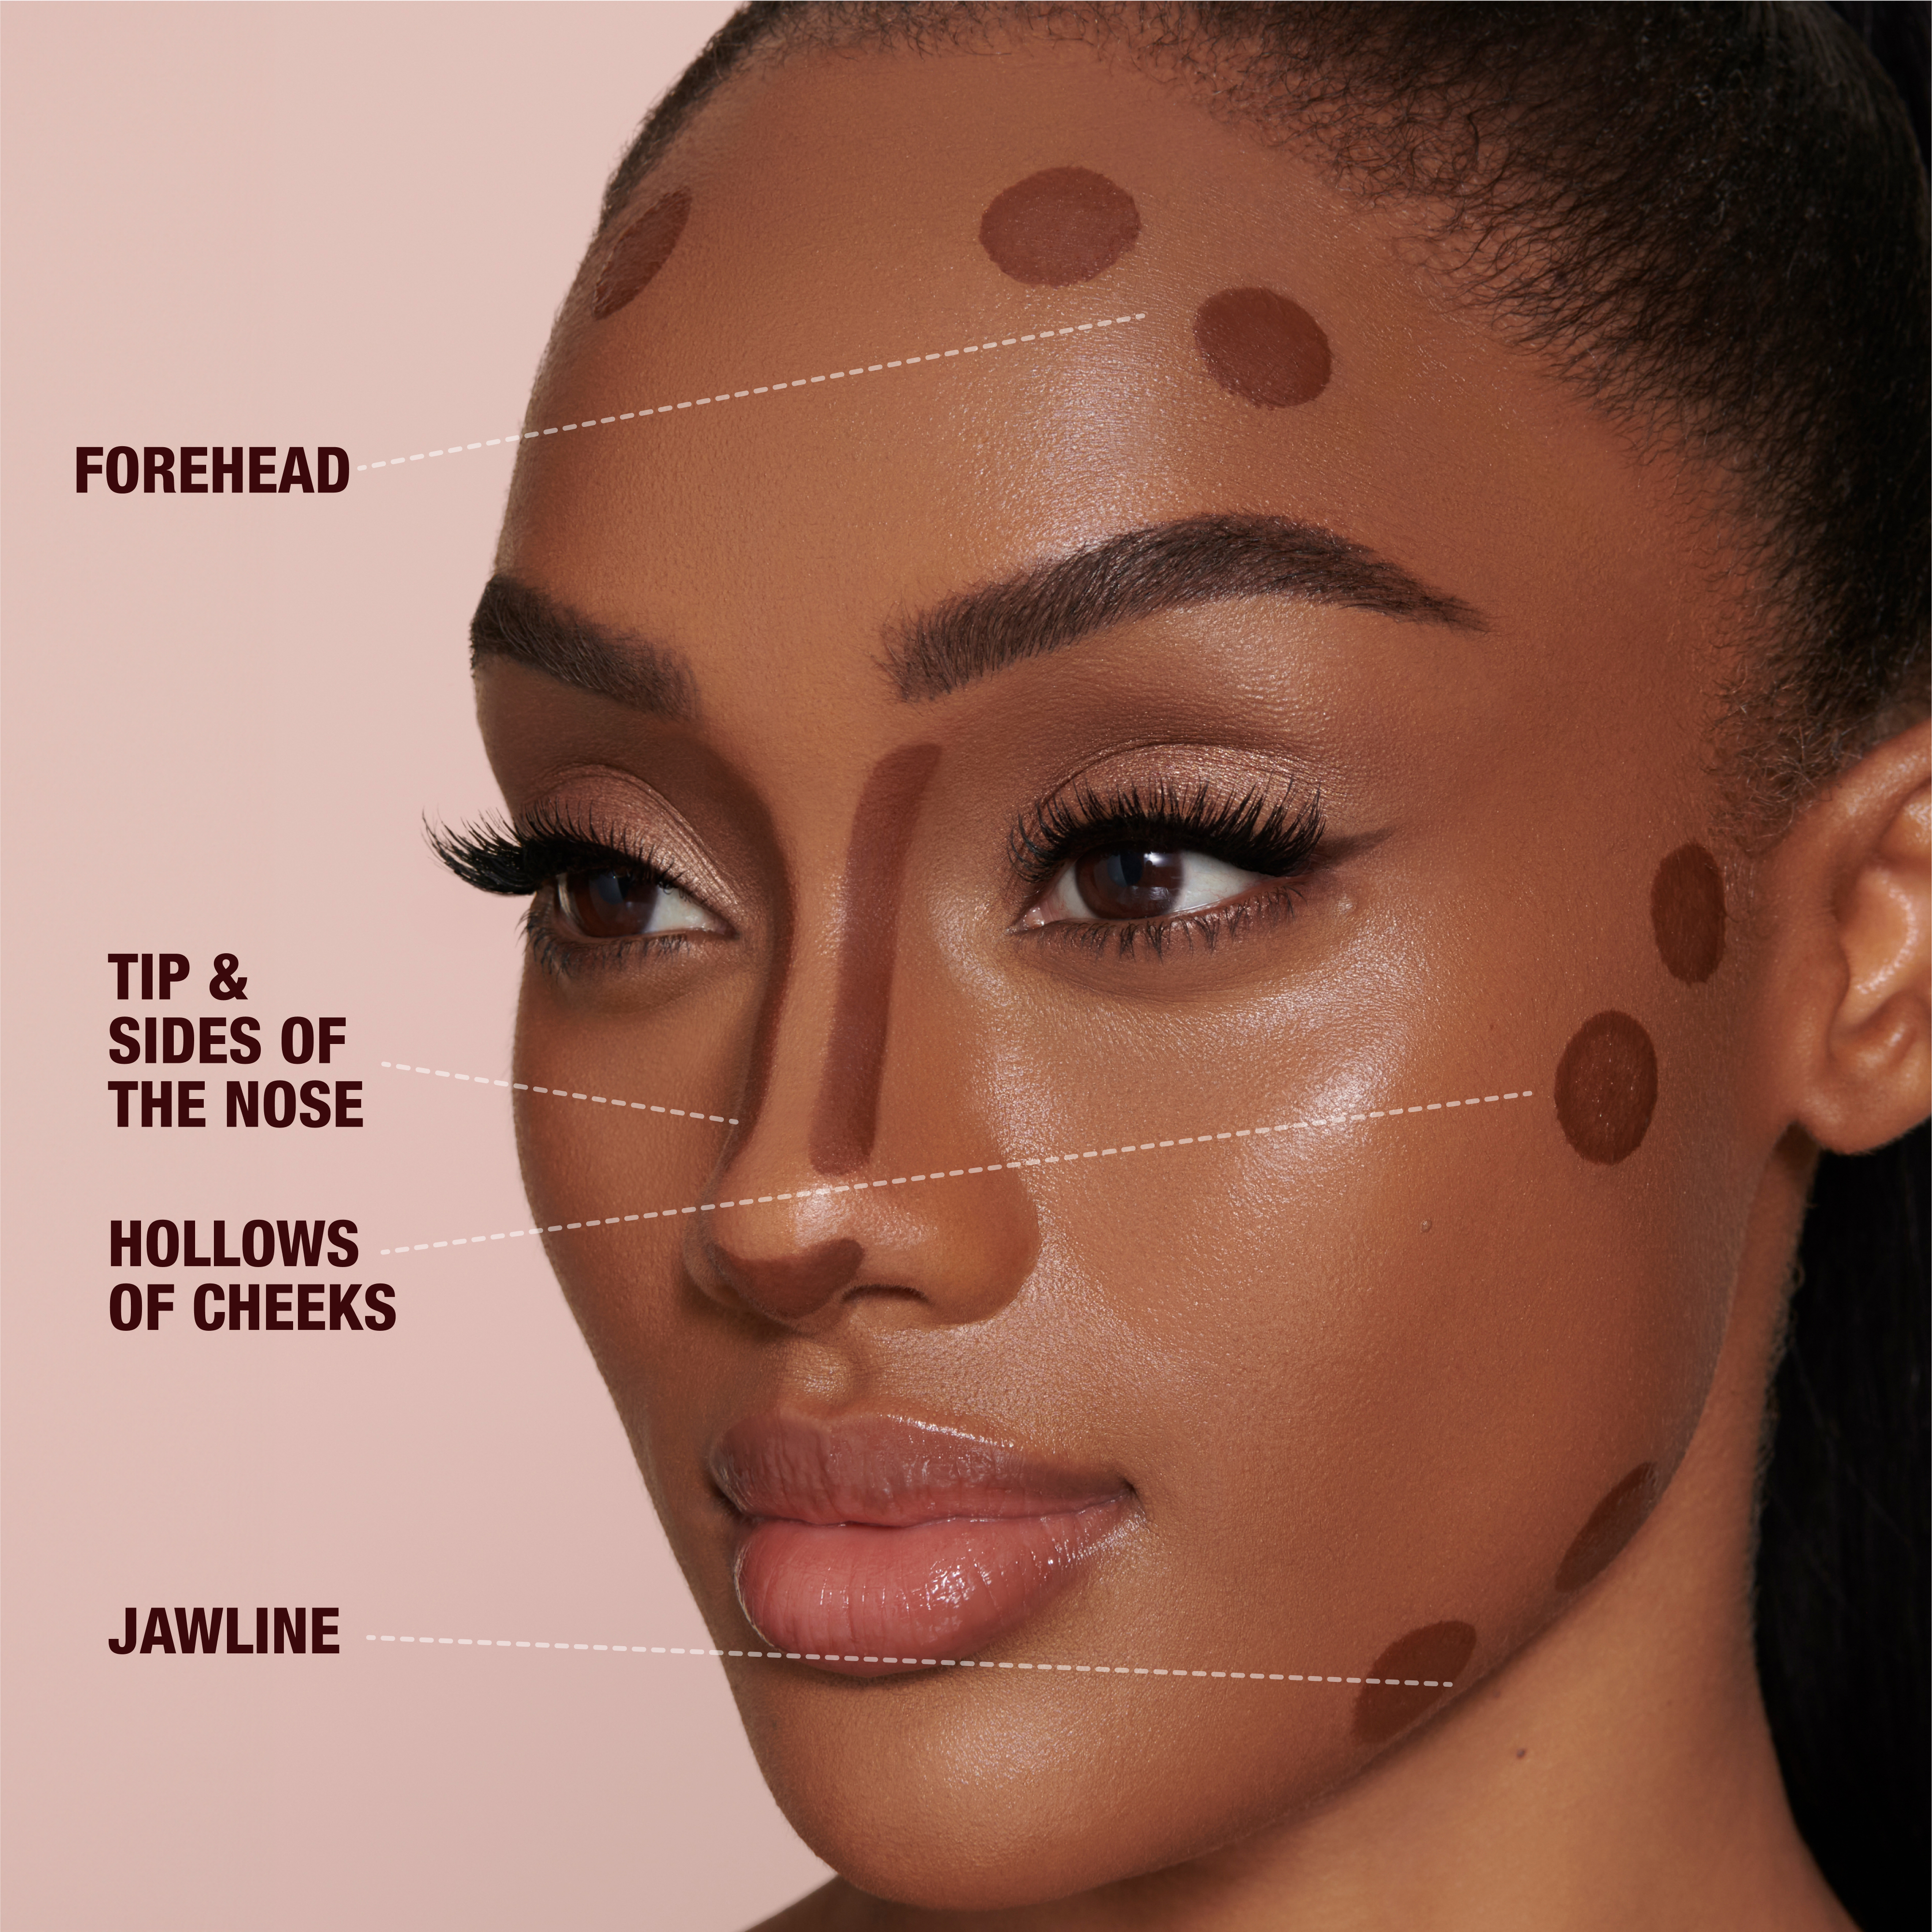
- Placement: Accurate placement based on individual face shape is key. Common contour areas include the hollows of the cheeks, temples, sides of the nose, and along the jawline. Highlights are applied to the high points of the face, such as the top of the cheekbones, bridge of the nose, brow bone, and cupid's bow.
- Blending: This is paramount. Harsh lines are the antithesis of successful contouring. Products must be blended seamlessly into the skin and base makeup to create a natural, gradient effect.
- Tools: Using the right brushes or sponges (e.g., angled contour brushes, fluffy blending brushes, precision highlighting brushes) greatly impacts application and the final blended result.
Ultimately, the "after" of contouring demonstrates an enhanced version of one's natural features, achieved by skillfully manipulating light and shadow to create depth and definition where desired.