Crafting a traditional cornucopia, also known as the Horn of Plenty, is a rewarding Thanksgiving centerpiece project. Follow these steps:
Materials Required
- Sturdy cardboard or craft foam cone (base form)
- Plaster cloth strips or paper mache paste and newspaper
- Scissors
- Paint (brown acrylic, metallic gold/silver optional)
- Paintbrushes
- Hot glue gun and glue sticks
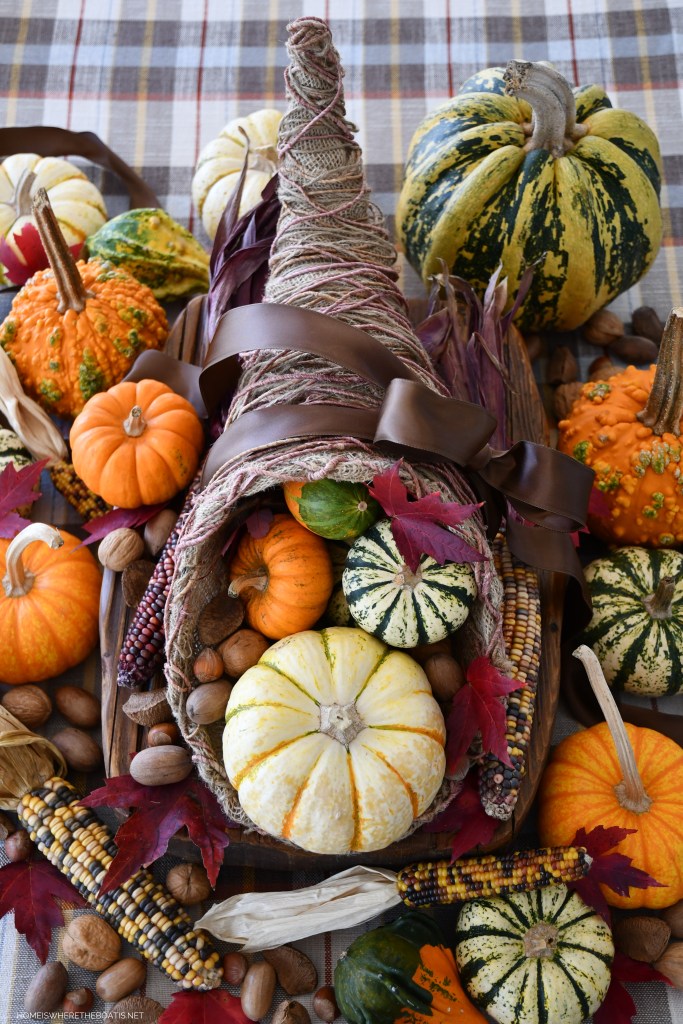
- Assorted autumn items: mini pumpkins, gourds, squash, Indian corn, autumn leaves (real/silk), nuts in shells, faux grapes, small apples, pears
Building the Horn Structure
Form the Cone: Roll your cardboard or craft foam into a wide cone shape, tapering significantly at one end. Secure the seam generously with hot glue.
Reinforce with Plaster/Paper Mache: Dip plaster cloth strips in water and smooth over the entire cone surface, overlapping strips. Alternatively, layer paper mache paste-soaked newspaper strips. Ensure full coverage, especially the wide opening and narrow tip. Allow to dry completely (several hours/overnight).
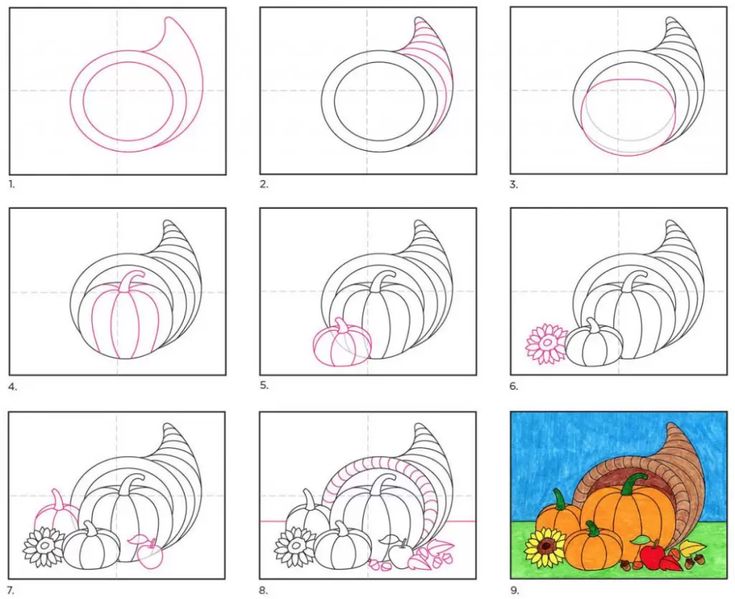
Finishing the Surface
Smooth and Paint: Lightly sand any rough edges. Paint the entire horn with brown acrylic paint. Add texture with darker brown dry-brushing if desired. Optionally, highlight ridges with metallic paint.
Filling the Cornucopia
Establish a Stable Base: Place larger, heavier items like small pumpkins or gourds near the wide opening and within the horn to anchor the arrangement. Secure them discreetly with hot glue if necessary.
Layer Abundantly: Fill gaps and overflow the opening with medium-sized items: apples, pears, more gourds. Tuck in smaller elements like nuts, berries, and pinecones amongst the larger pieces.
Add Texture and Color: Incorporate clusters of faux grapes, stalks of Indian corn, and sprigs of autumn leaves throughout the arrangement. Let some items cascade slightly out of the horn onto the base.
Tip: Place completed cornucopia on a sturdy tray or decorative platter to collect spills if using real fruit or vegetables.